NUnit Test Adapter for Visual Studio
The NUnit Test Adapter allows you to run NUnit tests inside Visual Studio. The current release, version 2-0, is designed to work with Studio 2012 (All updates), Visual Studio 2013 (All updates) and Visual Studio 2015 (tested with all pre-releases, checked April 2015). Some features are not available under VS2012 RTM.
Note that Releases of Visual Studio prior to VS 2012 did not have the ability to directly run tests built with Open Source testing frameworks like NUnit.
Installation
Beginning with version 0.95 there are two ways of installing the adapter within Visual Studio. See Note 1 below for info on how to choose.
- Use the Extension Manager
- Add it as a Nuget package to your solution. (New in 0.95, requires VS 2012 Update 1 or higher)
Installing With the Extension Manager
To install the NUnit Test Adapter using the Extension Manager, follow these steps:
- From within Visual Studio 2012, 2013 or 2015, select Tools | Extension Manager.
- In the left panel of the Extension Manager, select Online Extensions.
- Locate (search for) the NUnit Test Adapter in the center panel and highlight it.
- Click 'Download' and follow the instructions.
Use the Extension Manager to ensure that the NUnit Test Adapter is enabled.
Installing the Nuget Package
To add it is a Nuget package, you must have an active solution, then follow these steps:
- From Tools menu, use Library Package Manager, select Manage NuGet packages for solution
- In the left panel, select Online
- Locate (search for) NUnit Test Adapter in the center panel and highlight it
- You will find two packages, one without framework and one with framework. See note 2 below for which to choose.
- Click 'Install'
- In the "Select Projects" dialog, you need to select at least one project to add the adapter to, see notes below.
Notes
Note 1: How to choose between Extension and NuGet package
The Extension will apply to Visual Studio itself, and will work for all projects you use. All users of your solution need to install the Extension. If you use TFS Build you must also install the extension to the build system there. The Package will apply to the solution, and will work for any other user too, as it follows the solution, but requires the user to have Update 1 or above. It will also work for any TFS2012 Update 1 or above server build, including TF Service and requires no further installation.
Note 2: Choosing NuGet package
The adapter packages come with and without the NUnit framework. If you have only one test project you can choose the one with framework, that saves you from having to install both the NUnit package and the Adapter package. If you have multiple test projects you need to install the NUnit framework for all of these, but only one of these need the adapter, then choose the adapter package without framework. Installing the adapter for multiple projects will do no harm.
Note 3: Choosing both This will work, but the Nuget package will be ignored. Since this can be confusing, we don't advise it.
Usage
In preparation for using the test adapter, make sure that the Unit Test Explorer is shown in your window. If you don't see it, use the menu ( Test | Windows | Test Explorer ) to show it and position the window where you would like it within Visual Studio.
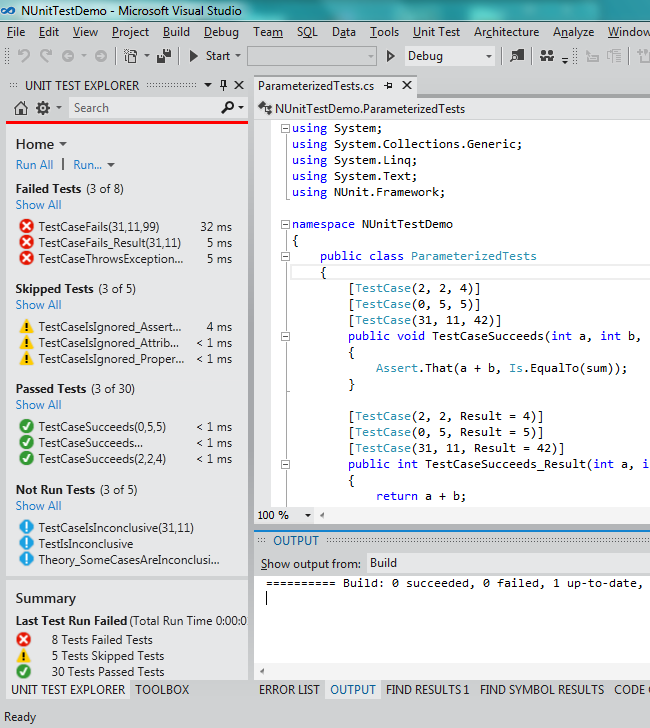
When you initially open a solution, no tests will be displayed. After compiling the assemblies in the solution, Visual Studio will interact with the NUnit Test Adapter to discover tests and a list of them will be shown in the Test Explorer.
Click on Run All in the Test Explorer to run all the tests. You may also select one or more tests in the list and run them by right-clicking and using the context menu. The context menu also contains entries for debugging tests and for navigating to the source code of a test.
Tests may be grouped by Duration and Outcome under VS2012 RTM and also by Traits and Project using Update 1, and Class using Update 2. NUnit translates any Categories and Properties used on your tests to Visual Studio as Traits.
Tests may be filtered in Visual Studio under Update 1 by Trait, Project, Error Message, File Path, Fully Qualified Name, Output and Outcome. Use the search edit box at the top of the list of tests to specify a filter.
Tests may be organized by play lists in Visual Studio under Update 2. Playlists are more or less equal to the old test lists from VS 2010.
Parameterized tests will show up as separate test cases for each set of parameters.
Known Problems
- There is no test status in Visual Studio corresponding to NUnit's Inconclusive result, so tests with this result are reported as Not Run. Click on the individual test to see the result.
- Theories are reported as individual cases, rather as a single unit.
- Startup performance is substantially improved but is still slower than using NUnit directly.
- A VSIX adapter of older version will be used regardless of version of NuGet adapter.
Workaround: Make sure you have upgraded VSIX adapter to latest version, or uninstalled it if you have the NuGet adapter in a solution. The 0.95 and later versions will output their version number in the Output window under Tests, any older versions will not display a version number.
Issues with other tools
- Versions of Resharper earlier than the 8.2 version has an issue with the NuGet adapter, which will prevent NUnit tests from running. Make sure you have updated Reshaper to at version 8.2.
Further information
For more information see the blogs by Charlie Poole and Terje Sandstrom Also see the following MSDN ALM blog post:
Part 2–Using Traits with different test frameworks in the Unit Test Explorer
Reporting Problems
Bugs should be reported using the issue tracker on Github,