Project Editor
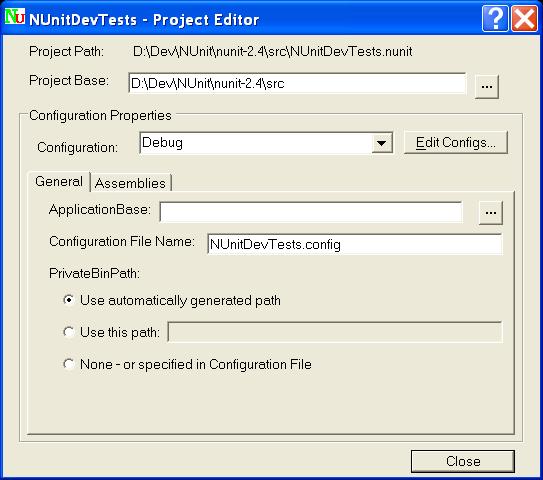
The Project Editor is displayed through the Project | Edit menu item and allows creating or modifying NUnit test projects. It should be noted that a Test Project is active whenever any tests have been loaded, even if no project was explicitly created or referenced. In the case of an assembly being loaded, an internal wrapper project is created. This allows the user to change settings and save the project directly without needing to perform any extra steps. The editor consists of a common area and two tabs, as seen in the image below.
Common Area
The common area of the Project Editor contains a label showing the full path to the project file. There is an edit box, allowing the user to change the project AppBase, which defaults to the directory of the project file. There is also a dropdown combo box permitting selection of the configuration to be edited and a button, which opens the Configuration Editor.

General Tab
The General tab allows setting a number of options pertaining to the selected configuration, all of
which will be stored in the NUnit project file as attributes of the
ApplicationBase
The ApplicationBase defaults to the directory containing the project file. Beginning with NUnit 2.2.3, it may be set to any location that is desired.
Configuration File Name
The configuration file defaults to the name of the test project with the extension changed from .nunit to .config. The user may substitute another name.
PrivateBinPath
By default, the PrivateBinPath is generated from the assembly locations specified on the Assemblies Tab. For those applications requiring a different level of control, it may be specified manually or using this editor or placed in the configuration file.
Assemblies Tab
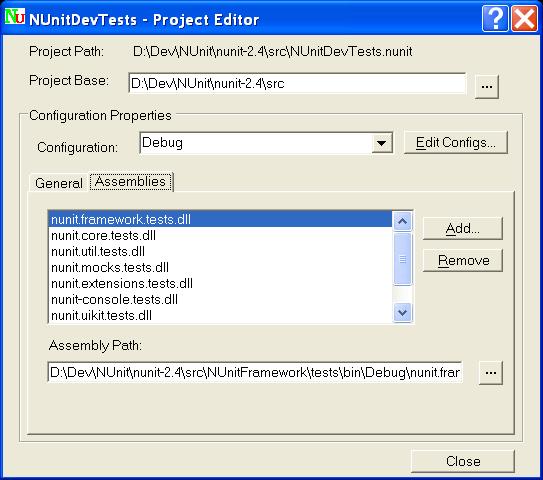
The assemblies tab contains the list of assemblies that form part of this test project.
Note: Although the dialog shows the location of assemblies as absolute paths, they are always persisted in the NUnit project file as paths relative to the application base. This allows moving projects as a whole to a different directory location.

Add...
Opens a dialog allowing adding an assembly to this configuration. If Visual Stuio support is enabled, you may also select and add a VS project.
Remove
After confirmation, removes the selected assembly from this configuration.
Assembly Path
This text box displays the full path to the selected assembly. You may edit the contents to change the path to the assembly.
